

How to Create a Drop‑Down List in Excel (Beginner‑Friendly Guide)
Tired of typos, rogue spellings, or colleagues who insist on entering “Yes / No / Maybe / Potato”? Drop‑down lists lock down data entry so your worksheets stay neat and error‑free. In this guide I’ll show you three ways to build them—from the quick‑and‑dirty method to fancy cascading lists—plus troubleshooting tips Microsoft’s own docs gloss over.
Quick‑Start Cheat Sheet (30 Seconds)
- Select the cell(s) you want to control.
- Click Data → Data Validation → Settings.
- Under Allow, choose List.
- In Source, type your items separated by commas (
Yes,No,Maybe). - Click OK. Boom—instant drop‑down.
(If that solved your problem, congratulations! Feel free to brag to your coworkers and skip straight to the “Key Takeaways” section. For everyone else, read on.)
Method 1 – Classic Drop‑Down with Data Validation
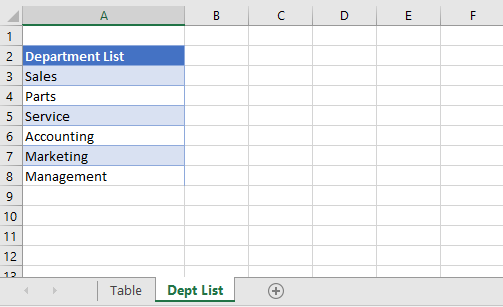
Step 1: Prepare Your List
Enter your allowed values in a single column or row. Keep them on the same sheet or, better, stash them on a hidden “Lists” sheet so nobody edits them accidentally.
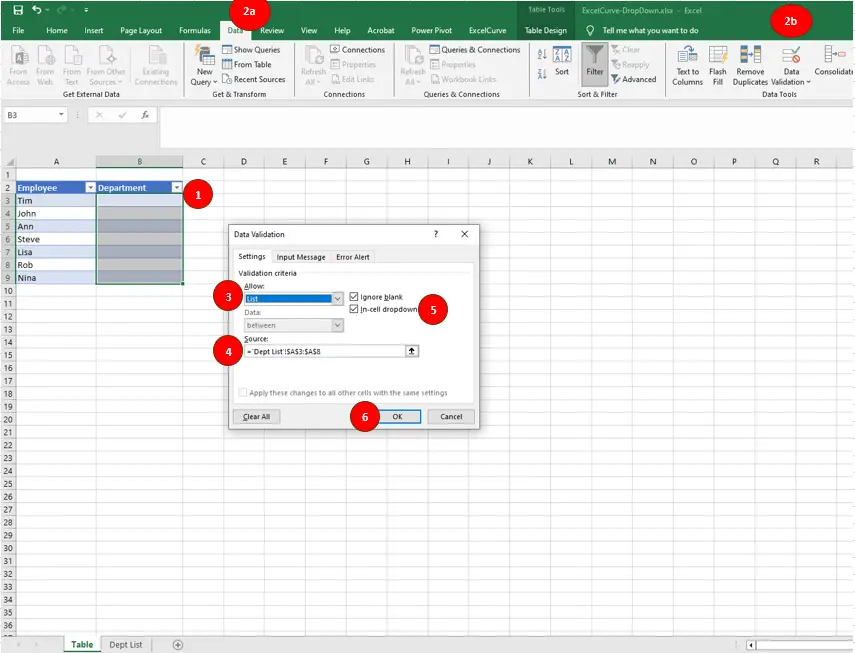
Step 2: Apply Data Validation
- Select the target cell range.
- Choose Data → Data Validation.
- Set Allow = List.
- Set Source to the range you just typed or type the items manually.
- (Optional) Untick In‑cell dropdown if you want to hide the arrow but still restrict entries.
- Click OK.
Step 3: Test & Copy
Click the arrow; pick an item. If it works, copy the cell downward or across to replicate. Done!
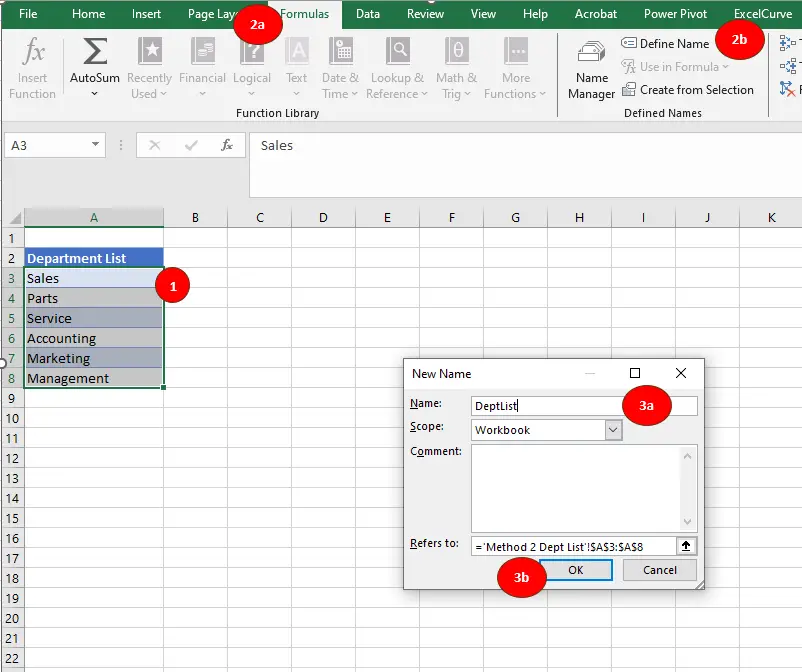
Method 2 – Named Range for Hassle‑Free Updates
- Select your list items.
- Click Formulas → Define Name (or press Ctrl+F3, then choose New).
- Give it a short, no‑space name (
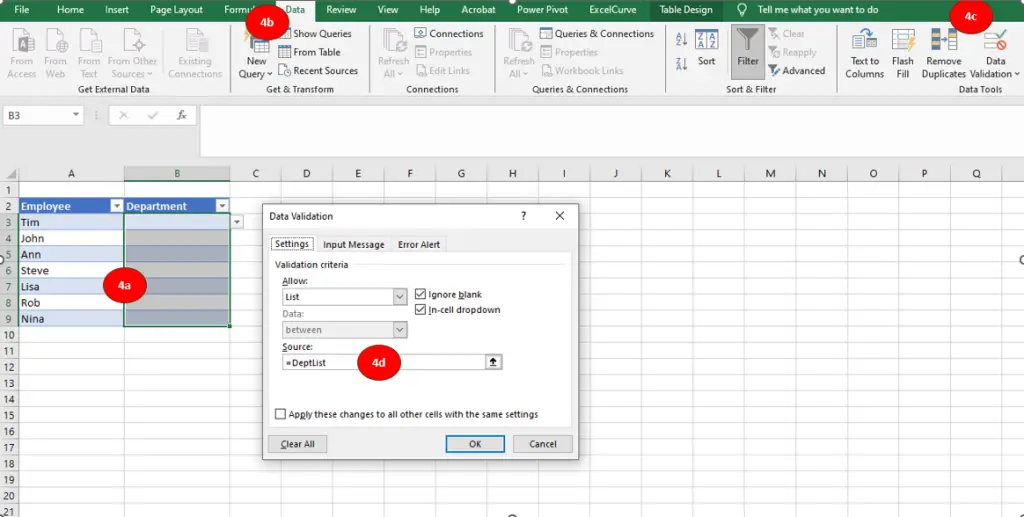
DeptList). - In Data Validation’s Source, type
=DeptList.
Now anytime you append values inside that range, every drop‑down updates automatically.
Method 3 – Dynamic Drop‑Down Lists (Auto‑Expanding)
Option A: Excel Table + Structured Reference (Excel 2013+)
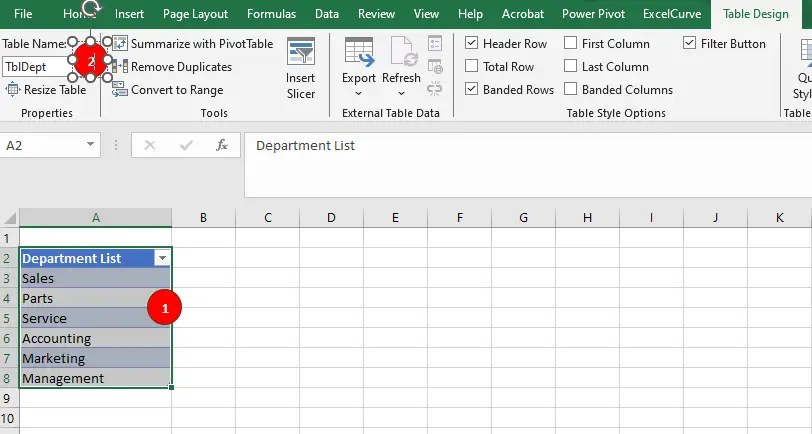
- Select the source list and press Ctrl+T to turn it into a Table.
- Give the table a one‑word name (
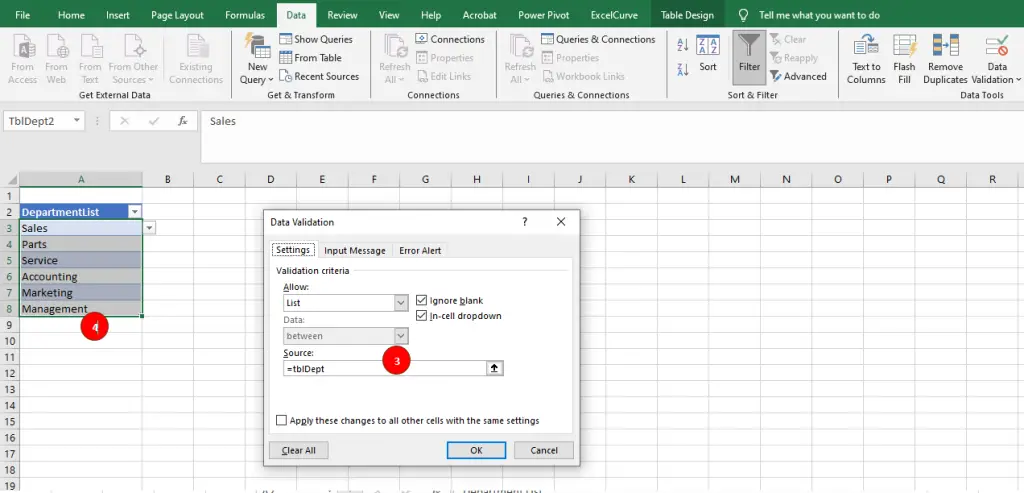
tblDept). - In Data Validation’s Source box, enter
=tblDept(swap in your column header). - Add new rows—your drop‑down grows instantly.
Option B: OFFSET / INDEX Formula Trick (Legacy Friendly)
For older Excel versions, wrap your range in either formula:
=OFFSET($A$2,0,0,COUNTA($A:$A)-1,1)or
=$A$2:INDEX($A:$A,COUNTA($A:$A))Either formula resizes automatically as you add items.
Editing or Deleting a Drop‑Down List
- Edit list items
– Direct range: just add/remove cells inside that range.
– Named Range or Table: resize or append rows—no Data Validation edits needed. - Remove Data Validation
1. Select the cells.
2. Data → Data Validation → Clear All.
3. Click OK.
Troubleshooting & FAQs
“Data Validation is Greyed Out!”
Check if the worksheet or workbook is protected, or if you’re in Shared/Co‑authoring mode. Unprotect or stop sharing and try again.
“The Source Currently Evaluates to an Error”
- Make sure the range exists.
- Named ranges are workbook‑level by default—ensure you didn’t create a sheet‑level name accidentally.
- For dynamic formulas, confirm they don’t spill errors.
Allowing Free‑Text Overrides
- In Data Validation, open the Error Alert tab.
- Untick Show error alert after invalid data is entered.
- (Optional) Add a warning message (“Try to pick from the list first!”).
Multi‑Select Drop‑Down (One Cell, Multiple Items)
Excel doesn’t support this natively, but a tiny VBA macro can concatenate choices. If your organization allows macros, drop this code into the sheet module:
Private Sub Worksheet_Change(ByVal Target As Range)
  If Not Intersect(Target, Range("B2")) Is Nothing Then
    If Target.Validation.Type = 3 Then
      If Target.Value <> "" And InStr(Target.Offset(0, 1).Value, Target.Value) = 0 Then
        Target.Offset(0, 1).Value = Target.Offset(0, 1).Value & _
          IIf(Target.Offset(0, 1).Value = "", "", ", ") & Target.Value
        Application.Undo  ' keeps the drop‑down cell unchanged
      End If
    End If
  End If
End Sub
Advanced Tricks
- UNIQUE Spill Ranges:
=UNIQUE(A2:A100)feeds a drop‑down that shows only distinct items. - Drop‑Downs in Excel for Web & Mobile: Data Validation works, but currently no multi‑select or dynamic array references. Keep lists short to improve performance.
Real‑World Use Cases & Free Template
- Project status tracker (Not Started / In Progress / Complete).
- Inventory in‑stock flags (In Stock / Low / Out of Stock).
- HR onboarding checklist (Yes / No drop‑downs for paperwork received).
Download a ready‑made workbook with all three methods pre‑built →
Key Takeaways
- Data Validation + List is the core mechanic—everything else is just smarter sourcing.
- Use Tables or Named Ranges to keep lists maintenance‑free.
- For dependent lists,
INDIRECTworks but dynamic arrays are cleaner in modern Excel. - Protect your lists (or hide the sheet) so no one sneakily edits your allowed values.
- If something breaks, nine times out of ten the worksheet is protected or the range reference got clobbered.
Your Turn
What’s the biggest headache you’ve had with drop‑down lists? Post it in the comments and I’ll tackle it—or admit defeat if Excel has finally out‑smarted me.